Software – Database Server

PostgreSQL is described as the world’s most advanced open-source database, and underpins a number of features of the home hub. It runs quite happily on the raspberry pi.

sudo apt-get install postgresql

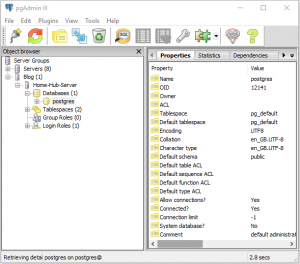
There are three areas that require configuring, in order to allow the controller and website scripts to access the database. In addition, we should include access from our desktop PC, which will allow us to administer the database using the management tool pgAdmin.

The first task is to edit the configuration file:

cd /etc/postgresql/9.4/main
sudo nano postgresql.conf

Uncomment and modify the listen_addresses connection setting and change the value to ‘*’ to listen on all interfaces. Save the file. Restart the database server.

sudo /etc/init.d/postgresql restart

The next task is to edit pg_hba.conf to enable connections from localhost and your PC.

sudo nano pg_hba.conf

Edit the file to enable connections from your desktop machine…

# IPv4 local connections:
host             all             all             client.ip.add.ress/32           md5

Access from the pi itself should already be configured…

# IPv6 local connections:
host             all             all             ::1/128                                         md5

save the file, and reload the configuration.

sudo /etc/init.d/postgresql reload

The final task is to set the postgres user password. Replace ‘raspberry’ with your chosen password.

sudo -u postgres psql -c "alter user postgres password 'raspberry';"

You should now be able to connect to the database server from pgAdmin running on your client PC.

In the next post we will create a skeleton database.

Software – Samba

In order to deploy and modify our python and php scripts it is useful to have samba installed on the headless pi, so you can edit the scripts in your favourite text editor on the desktop.

First create a directory for the python scripts…

cd /usr/local/bin
sudo mkdir -p code/controller

set the ownership…

sudo chown -R pi:pi code

update the operating system…

sudo apt-get update

install samba…

sudo apt-get install samba samba-common-bin

then edit the configuration…

sudo nano /etc/samba/smb.conf

Place this section at the end of the config file, and save.

[controller] comment = controller code repository
path = /usr/local/bin/code/controller
writeable = yes
guest ok = no

Give the user pi permissions…

sudo smbpasswd -a pi

you will be prompted to enter a password.

Restart samba.

sudo /etc/init.d/samba restart

You should now be able to explore the pi’s directories:

I have found that Windows 10 requires a credential to be set up in advance, in order to explore the samba shares. In addition, the home directory for the pi user is set to read-only on samba installation, so you may want to change this in the configuration file.

The next requirement is a database server.

Software – Pi OS

The home hub will be running headless, as all interaction will be via the web interface, so RASPBIAN JESSIE LITE is the ideal starting point. Get the latest version raspbian-2017-07-05 from here:

http://downloads.raspberrypi.org/raspbian/images/

Please note that the latest version of Raspbian, Stretch, is not compatible due to the hub’s dependence on the PHP Pear library for database access.

Then you can prepare your SD card.  I have found that a 4GB card is perfectly adequate for storing 2 weeks of archive for about 10 sensors, and backs up in reasonable time.

The initial set-up needs to be done with a connected screen and keyboard, as SSH is disabled by default.

sudo raspi-config
  • change default pi password
  • change hostname to home-hub
  • set locale and timezone
  • enable ssh
  • make minimum memory available to GPU
  • reboot

You should now be able to connect the pi to your home network and access via SSH.

In the next post we will install samba, allowing us to manage our system from a client PC.