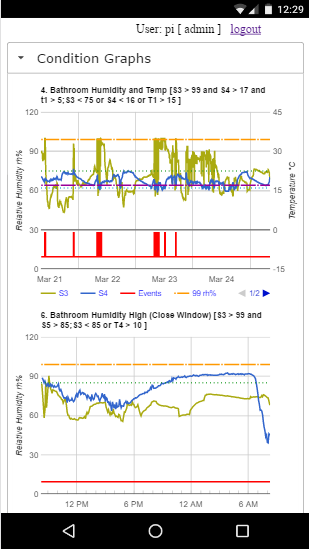
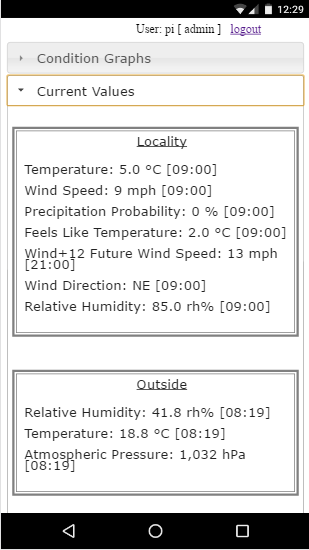
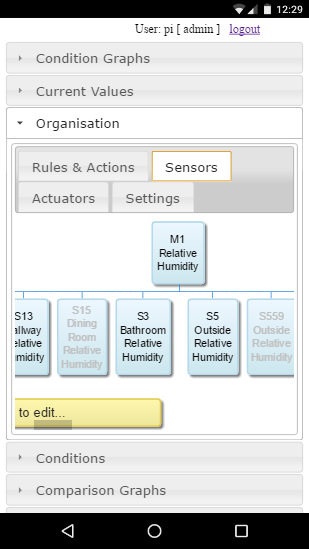
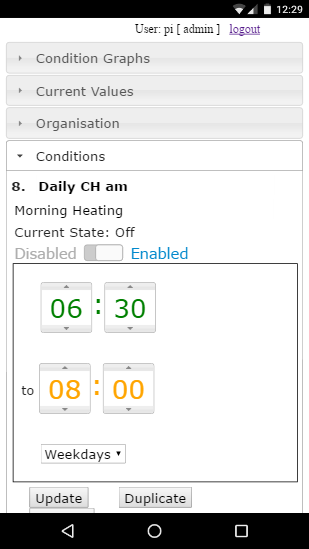
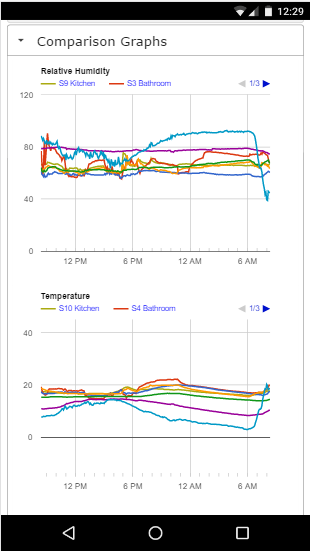
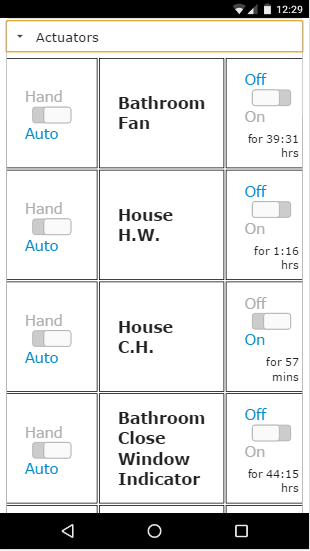
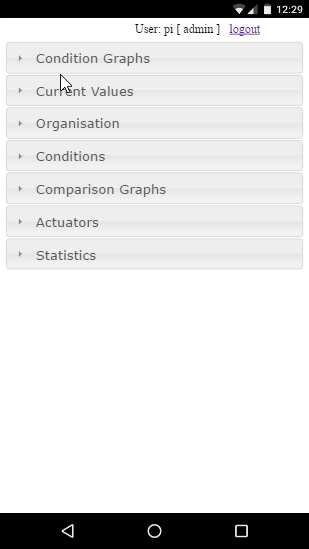
Now we have the database and controller scaffolded, the next task is to install the web-server and its database access. To give you a flavour of the website’s functionality, here are some screenshots.
Now for the installation…

Build a Raspberry Pi based hub to monitor and control your home
Now we have the database and controller scaffolded, the next task is to install the web-server and its database access. To give you a flavour of the website’s functionality, here are some screenshots.
Now for the installation…
Now is a good time to test the database access from a Python script, but first we need to install the PostgreSQL adapter for Python – psycopg.
sudo apt-get install python-psycopg2
Then we can place the following script in the /usr/local/bin/code/controller directory…
#
# hellodb.py script to show PostgreSQL and Pyscopg together
#

import sys
import psycopg2
import psycopg2.extras

try:
    cstr = "dbname='hub' user='postgres' host='localhost' password='raspberry'"
    conn = psycopg2.connect(cstr)
    cur = conn.cursor(cursor_factory=psycopg2.extras.DictCursor)
    cur.execute("SELECT * from \"Zone\"")
    rows = cur.fetchall()
    print "\nShow me the zones:\n"
    for row in rows:
        print row.get("ZoneID"), row.get("ZoneName")
except Exception:
    print("Unable to connect to the database")
    e = sys.exc_info()[0]
    print (e)
Run your script with the following…
cd /usr/local/bin/code/controller
sudo python hellodb.py
You should see the following output:
Show me the zones:
1 Kitchen
2 Bathroom
This script uses the Dictionary-like cursor found in the extras package. The advantage of this method of database access is that you can reference the columns by name instead of index, which makes the code more tolerant of database changes.
Having confirmed our controller can access the database, it is time to create the website.
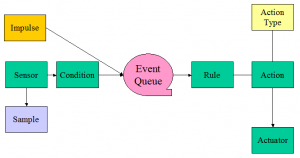
It’s worth stepping back at this point to take a look at the database schema, and highlight some of the key tables.
Zone – a zone is a physical sub-space within the area being monitored. Typically a room: Kitchen, Bathroom, etc. but can represent larger spaces such as Outside or Locality. Zones have x, y, z co-ordinates which enable the website to display values overlayed on a floor-plan. Sensors, Actuators and Impulses are all associated with a Zone.
Measurand – a measurand is a physical quantity to be measured e.g. Temperature, Relative Humidity, etc. Sensors are associated with a Measurand.
Sensor holds the key data for each sensor. There is no Sensor Type, but the SensorFunction column effectively has a pointer to the code which handles the reading.
The Actuator table keeps track of the hub outputs such as fan relays, indicators, etc.
Sample is where current values are logged, which becomes the source for graphs on the website.
The EventQueue is important, because it queues events such as a threshold being reached or an impulse from the occupant, until they can be processed by the Rules Engine.
In the next post we will test that our controller can access the database.
Now we have a working database server, we can create and populate the hub database itself.
This is the first of a number of commands that use wget to download files from the project repository.
cd ~
wget http://warrensoft.co.uk/home-hub/database/scripts/hub-skeleton.sql
psql -h localhost -U postgres -d postgres -f hub-skeleton.sql
After confirming your postgres password you should have a hub database containing 16 tables (some populated with basic data), plus a number of supporting views and functions. We will examine this schema in the next post.
PostgreSQL is described as the world’s most advanced open-source database, and underpins a number of features of the home hub. It runs quite happily on the raspberry pi.
sudo apt-get install postgresql
There are three areas that require configuring, in order to allow the controller and website scripts to access the database. In addition, we should include access from our desktop PC, which will allow us to administer the database using the management tool pgAdmin.
The first task is to edit the configuration file:
cd /etc/postgresql/9.4/main
sudo nano postgresql.conf
Uncomment and modify the listen_addresses connection setting and change the value to ‘*’ to listen on all interfaces. Save the file. Restart the database server.
sudo /etc/init.d/postgresql restart
The next task is to edit pg_hba.conf to enable connections from localhost and your PC.
sudo nano pg_hba.conf
Edit the file to enable connections from your desktop machine…
# IPv4 local connections:
host all all client.ip.add.ress/32 md5
Access from the pi itself should already be configured…
# IPv6 local connections:
host all all ::1/128 md5
save the file, and reload the configuration.
sudo /etc/init.d/postgresql reload
The final task is to set the postgres user password. Replace ‘raspberry’ with your chosen password.
sudo -u postgres psql -c "alter user postgres password 'raspberry';"
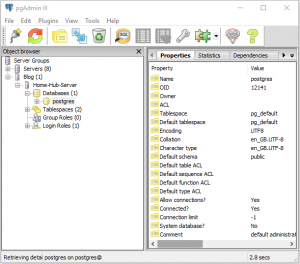
You should now be able to connect to the database server from pgAdmin running on your client PC.

In the next post we will create a skeleton database.
In order to deploy and modify our python and php scripts it is useful to have samba installed on the headless pi, so you can edit the scripts in your favourite text editor on the desktop.
First create a directory for the python scripts…
cd /usr/local/bin
sudo mkdir -p code/controller
set the ownership…
sudo chown -R pi:pi code
update the operating system…
sudo apt-get update
install samba…
sudo apt-get install samba samba-common-bin
then edit the configuration…
sudo nano /etc/samba/smb.conf
Place this section at the end of the config file, and save.
[controller] comment = controller code repository
path = /usr/local/bin/code/controller
writeable = yes
guest ok = noGive the user pi permissions…
sudo smbpasswd -a piyou will be prompted to enter a password.
Restart samba.
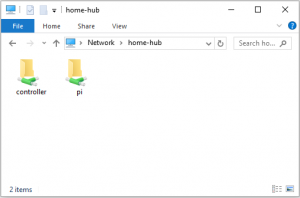
sudo /etc/init.d/samba restartYou should now be able to explore the pi’s directories:
I have found that Windows 10 requires a credential to be set up in advance, in order to explore the samba shares. In addition, the home directory for the pi user is set to read-only on samba installation, so you may want to change this in the configuration file.
The next requirement is a database server.
The home hub will be running headless, as all interaction will be via the web interface, so RASPBIAN JESSIE LITE is the ideal starting point. Get the latest version raspbian-2017-07-05 from here:
http://downloads.raspberrypi.org/raspbian/images/
Please note that the latest version of Raspbian, Stretch, is not compatible due to the hub’s dependence on the PHP Pear library for database access.
Then you can prepare your SD card. I have found that a 4GB card is perfectly adequate for storing 2 weeks of archive for about 10 sensors, and backs up in reasonable time.
The initial set-up needs to be done with a connected screen and keyboard, as SSH is disabled by default.
sudo raspi-config
You should now be able to connect the pi to your home network and access via SSH.
In the next post we will install samba, allowing us to manage our system from a client PC.
The majority of measurements in the production version of the home hub utilised the DHT22/AM2302 temperature and humidity sensor.
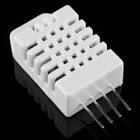
The DHT22, AM2302 or equivalent has a number of benefits:

For this reason I have deployed the BME280 in situations where greater distances are involved. Fortunately the production version was installed in a bungalow, which permitted the majority of rooms to be reached using short cable runs from the centrally loft-mounted pi.
Unfortunately, the BME280 sensor requires additional circuitry to connect the Pi to its I2C or SPI interface. I will cover this in a later post.
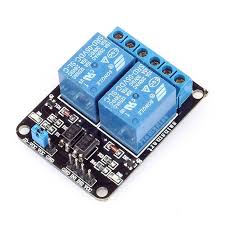
I have found these common relay modules to be suitable for the control outputs for the home hub, where switching of mains voltages is required. They feature optical isolation, are low cost, come in single, dual and multiple packages and are readily available from a number of suppliers. There are many tutorials on the web if you require further information on interfacing, but do take care when working with mains electricity, and consult a qualified electrician if in any doubt.
The production version of the home hub is running on a Raspberry Pi 2 with 1 GB of ram. The 4 cores and extra ram is helpful to run the PostgreSQL database, but it is probably possible to run the hub on a lower specification Pi. I have employed Ethernet networking, to connect to my home network, as wi-fi has not proved sufficiently reliable in my set-up. The usual caveats about using a properly sized power supply are particularly relevant for this project, as you may be providing power for additional sensors and relays.